....once you try the 2 sided binding, you are going to luv it!!

...for most of my quilts I cut a scant 2.5" binding strip and sew a 3/8" seam allowance when attaching the binding to my quilt sandwich, with that in mind lets begin...
- Cut the binding strip you want to show on the quilt back 1-7/8" wide.
- Join as many strips by piecing them on the 45 degree to make a continuous long strip measuring at least 18 inches longer than the outside edges of your quilt.
- Press the 45 degree seams open.
- Cut the binding strip that you want to see on the front of the quilt a scant 1" strip.
- Join your front strips using the same method as you joined the back strips, making a long continuous strip the same length as the back binding strip.
- Press the 45 degree seams open.
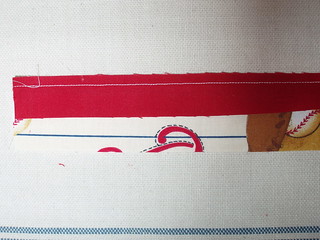
- Stitch the front binding strip to the back binding strip, right sides together stitching 1/4" seam along the long edge, keeping the edges even.
- Set the long seam and press seam to the dark or to the fabric used for the front if both front and back are the same value. The binding should now measure a scant 2-3/8".
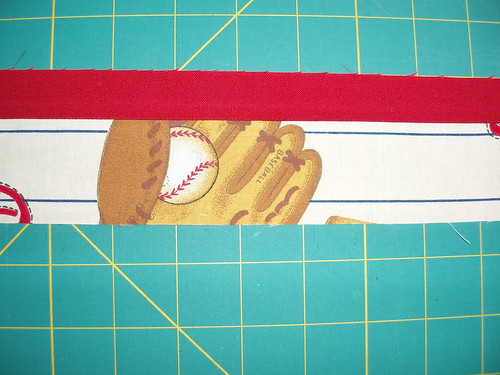
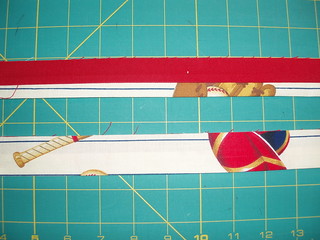
- Now press the binding as you would normally press... with wrong sides together...keeping the long raw edges even.
- The top strip shows the right side of the binding, the bottom strip shows the back of the binding strip
- Place the binding with the front (red) binding against the front of the quilt sandwich, make sure the raw edges of the binding are even with the raw edges of the quilt sandwich. Stitch 3/8" seam allowance.
- Shown below is the front of the quilt with the binding stitched on. I always press the binding from the right side of the quilt with the right side of the binding face up before I flip the binding to the back and hand stitch down.....I pin my binding around the whole quilt before I start to hand stitch. I pin my 4 corners first. I place 1 pin about 1" from each side of the corner and adjust the corner to a perfect miter and pin .
- Please keep in mind if the border has stars or flying geese, you will cut the points off if your seam allowance is greater than 1/4".
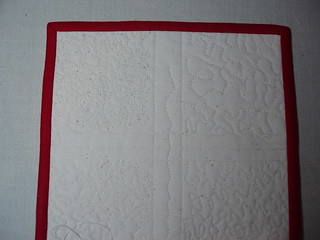
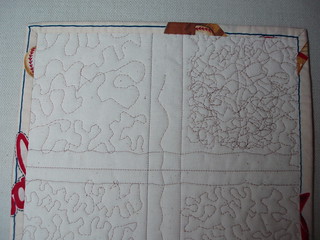
- For this tutorial I used a quilt sandwich that was my first attempt at Free Motion Quilting (FMQ) many years ago. This is the front of the sample.
I hope you enjoyed my 2 sided binding tutorial
When I did my first 2 sided binding ...
I started with a few crib/lap quilts...then tackled a bed quilt.
I am going to try a bias 2 sided binding....
I'll let you know how it turns out.
hugs and happy stitching
When I did my first 2 sided binding ...
I started with a few crib/lap quilts...then tackled a bed quilt.
I am going to try a bias 2 sided binding....
I'll let you know how it turns out.
hugs and happy stitching




Thanks Pauline great tutorial I think I will try it with the baby quilt I am making it seems fairly easy. Blessings Sandra
ReplyDeleteThanks so much for the great tutorial. I'd love to hear how yours turns out with bias.
ReplyDeleteThanks for the tutorial and for another chance to enter the giveaway!
ReplyDeleteI did a 2 sided binding several years ago and was thrilled with how it turned out. I thought it would be really hard to do and was pleasantly surprised to find out that it wasn't. Hopefully your tutorial will encourage more quilters to try it.
ReplyDeleteI have never done a binding. Your techniques make it look easy enough to do. Thank you so much. I might try this in the future. Blissful Stitching...
ReplyDeleteThank you again for a great tutorial Pauline. This looks like something I want to try.
ReplyDeleteWhen I first read two sided binding I thought way to hard but after reading through your tutorial I think maybe I could do it.
ReplyDeleteGreat tut! I put the binding on 2 wall quilts today, I was lazy and did them totally by machine. This was the first time I tried it, a little sloppy. They came out O.K., by hand would have been better. I can't FMQ either and I stink with the mid arm machine also. Thanks so much for the lesson. ;-> Toni Anne
ReplyDeleteOlá,eu fiz em uma colcha para minha neta,o seu último tutorial, e ficou certinho e lindo,muito obrigada.Agora vou tentar esse seu processo que me pareceu complicado mas...acho que com boa vontade e necessidade eu vou me encontrar,e se não,eu aprendi o outro.Mas quero ver o viés também.O saber não ocupa lugar,não é?Um beijo e Deus te abençoe.tiacarminhapezzuto@gmail.com
ReplyDeleteNice tutorial, and yes your sample was the one I saw yesterday. I see what you post on Flickr, remember? Since you are a contact of mine it shows up in my contact list, so I really did see your pics yesterday. = )
ReplyDeleteThanks so much for your excellent binding tut. I'm just a beginner and trying to absorb as much as possible to make my project look professional. I've ripped and will rip to to meet this end. Thanks so much for your "finishing" tips.
ReplyDeleteThanks for the tutorial. I'd never even thought of using a two color binding, but can see how it would be a good choice for some projects.
ReplyDeleteThanks for the tutorial. I'll definitely be trying this out.
ReplyDeleteVery nice tutorial! I do it similarly, but with 1/4 inch seams. I love having the surprise of a different binding color on the back. :-)
ReplyDeleteThanks for the info!
ReplyDeleteThanks for the tutorial.I`ve never use two binding and this looks fantastic!!
ReplyDeleteSeems simple enough when you describe it. Hope mine will look as good when I attempt it.With my luck I'll get it on backwards and have to rip out and start again.
ReplyDeleteWhat a great idea! I'll certainly be trying it!
ReplyDeleteThis is a good idea - many times I want different colors for the binding - especially for pieced backings. Thanks for the tutorial.
ReplyDeletethank you needed that
ReplyDeleteI am not sure I will ever do this, but there may be a quilt one day where it would be good to try.
ReplyDeleteI may give this a try on a smaller project, sitting here reading it I can't seem to get the idea..will have to re-read while having items in hand to folow the instr.
ReplyDeleteThis is an awesome tutorial Pauline! Thank you!
ReplyDeleteThank you for this! What a great idea!
ReplyDeleteGreat tutorial..thanks!
ReplyDeleteAmazing! I may be trying this too!
ReplyDeleteGreat tutorial- I will be trying this for sure!
ReplyDeleteThanks for great tutorials!
ReplyDeleteCrazy fun!! I keep trying to FMQ as well... ummmm not workin so well for me! But I keep trying! LOL Till then straight lines it is!!
ReplyDeleteI just found this Paula and I am going to try this with my next quilt. What I like about it is that I can have two fabrics to match either side, and using up more fabrics. Thanks so much.
ReplyDeleteHi, I just finished making a healing heart quilt for someone at the quilting group I attend, and I used your tute for the two sided binding...and I'm still tickled pink with it. Thanks for sharing the tute.
ReplyDeleteHugs
Naomi
I've just published the post on my blog about the quilt and have linked up to this tutorial in the post.....hope that was ok to do.
ReplyDeletehttp://beeshebags.blogspot.com.au/2014/07/healing-heart-quilt-finished.html
Hugs
Naomi
I've just published the post on my blog and linked up to this tutorial. Hope you find this ok. regards Frances
ReplyDeletewww.quiltingwoodlands.blogspot.com