Wednesday, May 30, 2012

I've been Missing in Action....and a winner


...of the 'Me and My Sister' Giveaway.

I'm having major anxiety attacks lately and am not dealing with them very well...
...major life changes I should be excited about
but struggling with the unknown!!
I've not been blogging, sewing much or doing much of anything 
except eating...
I have no ambition and as a result I must apologize
for being so late in announcing my winner!! 

...from all comments from May 1 to midnight May 18
I wrote all the names, the posting date and your comment number(s) in my notebook
then cut the pages
and put all of them in this basket...
...I'm not going to pick my winner this way again
way way too much work to pick a winner...
much prefer...Mr Random Number.


the winner is 
from the May 18th posting
comment #21
krislovesfabric


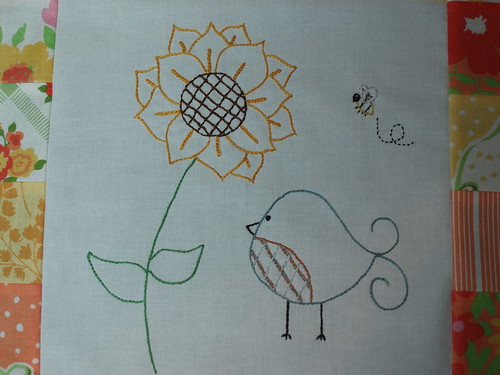
"Love your birdies, I have my top done too but am struggling with the decision of how to quilt it...thanks for sharing :)"

Thank you...everyone for taking the time to leave me a comment...
...for my new followers 
and my regular followers
a big thank you for your patience!!!
I have sent Kris an email and the package will be in the mail this afternoon.


I haven't forgotten about the tutorial for the message board 
and the Tea Towel Apron.
I've got them on my list of "things I must do......soon"!


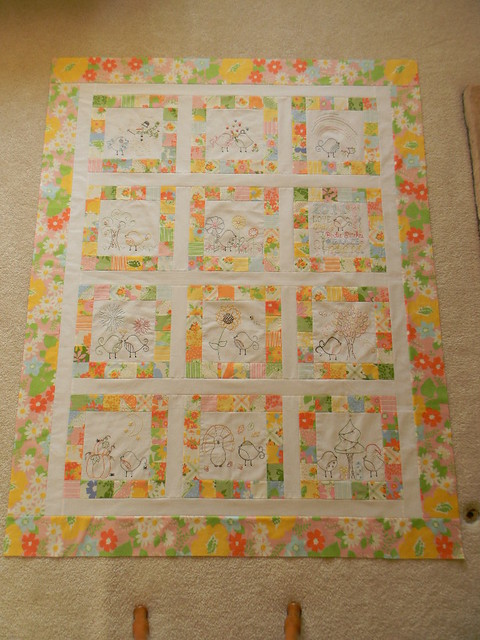
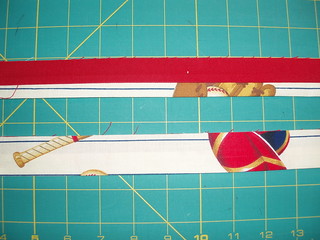
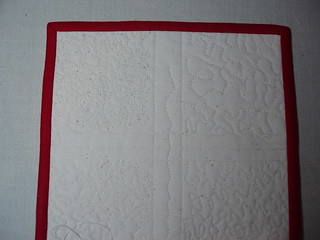
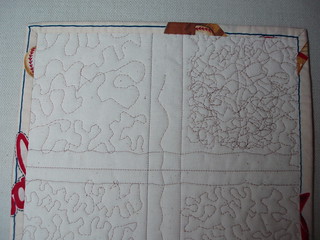
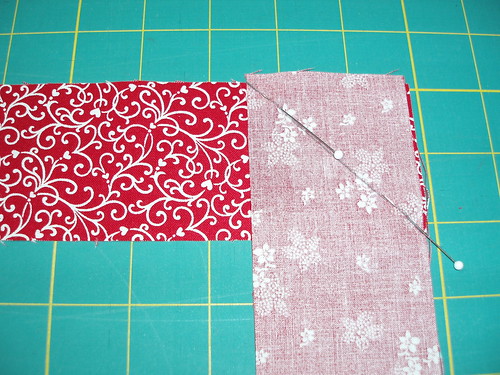
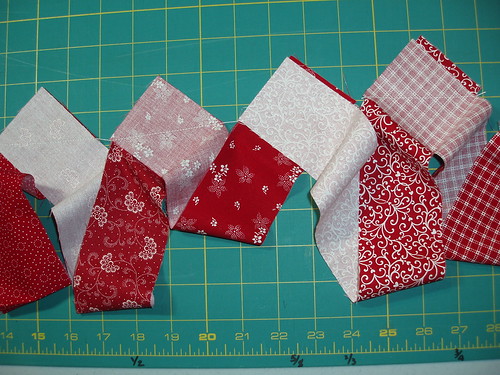
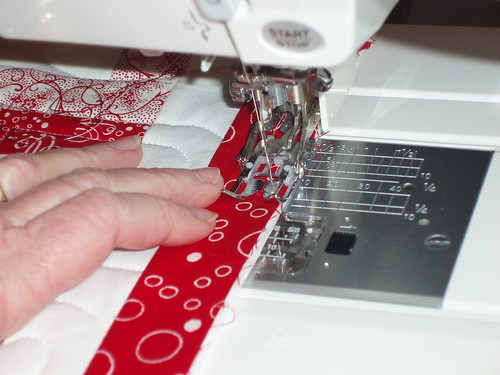
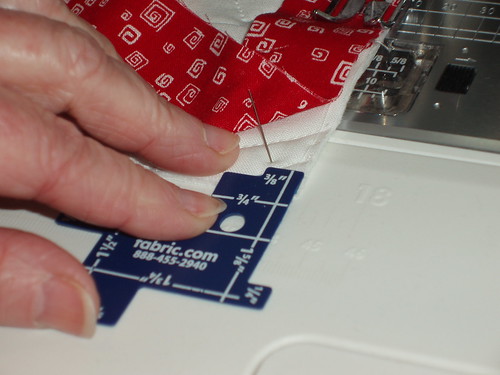
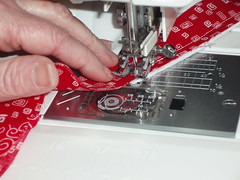
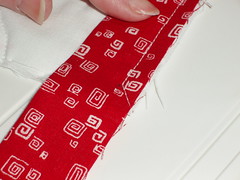
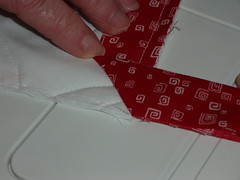
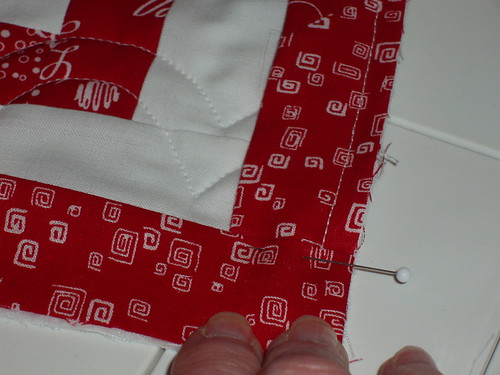
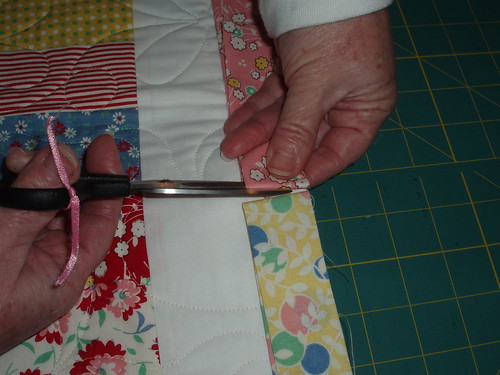
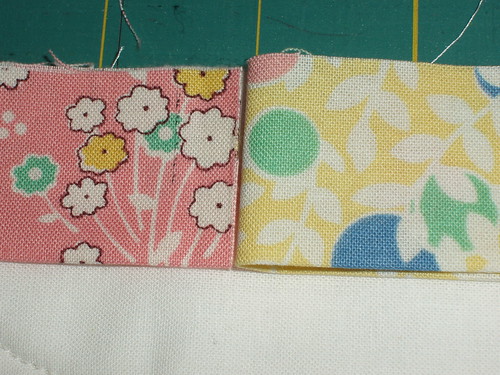
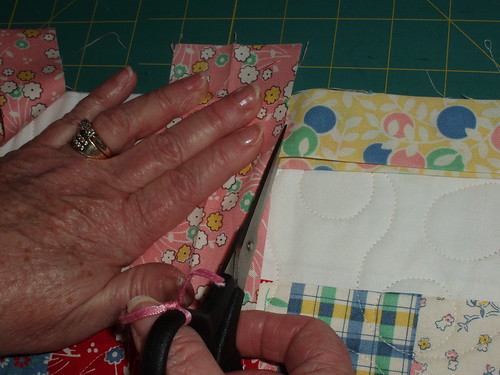
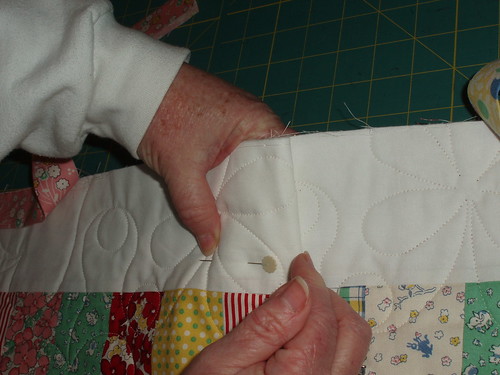
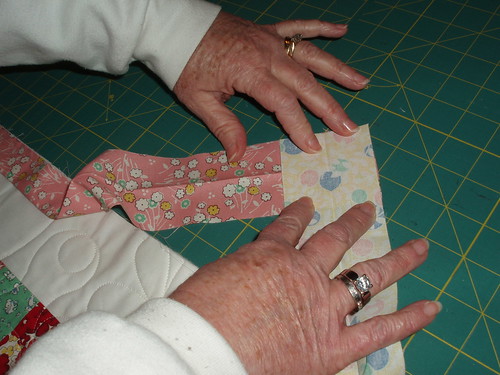
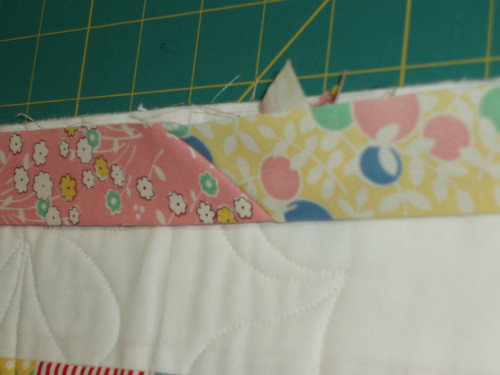
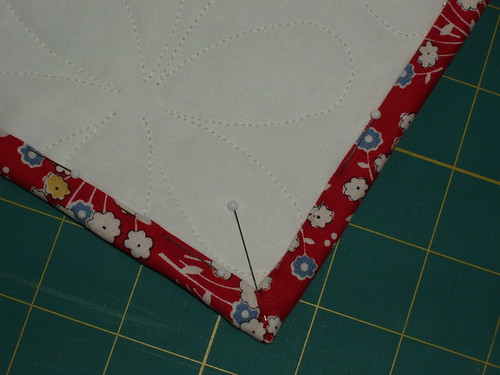
I did manage to border my LMS BOM and am happy how it turned out!!
LMS Birdie quilt top


hugs and happy stitching

Pauline


Friday, May 18, 2012

My blocks are stitched...

...my birdie BOM by Little Miss Shabby!!

I last blogged about it back in August when I had finished the August block...

LMS block 8 closeup

Since then they have been sitting in a pizza box and in April I opened it and finished stitching the blocks.

...here is September


...and October


...and November


...finally December


The quilt top is finished, I'm really happy with it.
I made a few minor changes and I will add some embellishments after it is quilted.
I just can't get a good picture of the whole quilt...I'll try picture taking again tomorrow
or I may wait until it is quilted and bound.

hugs and happy stitching

Pauline

Wednesday, May 16, 2012

A 2 sided binding....tutorial

....once you try the 2 sided binding, you are going to luv it!!

...for most of my quilts I cut a scant 2.5" binding strip and sew a 3/8" seam allowance when attaching the binding to my quilt sandwich, with that in mind lets begin...

  • Cut the binding strip you want to show on the quilt back 1-7/8" wide.
  • Join as many strips by piecing them on the 45 degree to make a continuous long strip measuring at least 18 inches longer than the outside edges of your quilt.
  • Press the 45 degree seams open.
  • Cut the binding strip that you want to see on the front of the quilt a scant 1" strip.
  • Join your front strips using the same method as you joined the back strips, making a long continuous strip the same length as the back binding strip.
  • Press the 45 degree seams open.
  • Stitch the front binding strip to the back binding strip, right sides together stitching 1/4" seam along the long edge, keeping the edges even.
2 sided binding step 1

2 sided binding step 2

  • Set the long seam and press seam to the dark or to the fabric used for the front if both front and back are the same value.  The binding should now measure a scant 2-3/8".
2 sided binding step 3
  • Now press the binding as you would normally press... with wrong sides together...keeping the long raw edges even.
2 sided binding step 4
  • The top strip shows the right side of the binding, the bottom strip shows the back of the binding strip
  • Place the binding with the front (red) binding against the front of the quilt sandwich, make sure the raw edges of the binding are even with the raw edges of the quilt sandwich.  Stitch 3/8" seam allowance.  
  • Shown below is the front of the quilt with the binding stitched on.  I always press the binding from the right side of the quilt with the right side of the binding face up before I flip the binding to the back and hand stitch down.....I pin my binding around the whole quilt before I start to hand stitch.  I pin my 4 corners first.  I place 1 pin about 1" from each side of the corner and adjust the corner to a perfect miter and pin . 
  • Please keep in mind if the border has stars or flying geese, you will cut the points off if your seam allowance is greater than 1/4".
2 sided binding step 5


  • For this tutorial I used a quilt sandwich that was my first attempt at Free Motion Quilting (FMQ) many years ago.  This is the front of the sample.

2 sided binding front

  • and this is the back.....to this day I still can't FMQ with my domestic machine....
2 sided binding back

I hope you enjoyed my 2 sided binding tutorial
When I did my first 2 sided binding ... 
I started with a few crib/lap quilts...then tackled a bed quilt.

I am going to try a bias 2 sided binding....
I'll let you know how it turns out.


hugs and happy stitching


Tuesday, May 15, 2012

Binding Tutorial


Binding made Easy!

I luv quilting and the binding is my favorite part of making a quilt.  
I would like to share a few of my binding tips with you 
and hopefully I can ease your binding fears.
 You will see how easy it is to achieve nice mitered corners....
quilt front corner
.....and how easy it is to join your binding ends
using a 45 degree angle seam.
You will not be sewing on a cut bias
so no stretching as you join the binding ends.

7

MAKING THE BINDING

Binding strips are usually cut at 2 1/2" or 2 1/4 '' wide and
sometimes narrower depending on the quilting project. 
Most quilters use binding strips cut on the straight of grain, WOF.  
If your quilt has scalloped or curved edges you would always cut your strips on the bias
....but some quilters always use bias vs straight of grain especially on
lap and bed size quilts because
bias bindings are stronger and wear better over time. 
I usually use 2 1/2" strips with a 3/8" seam allowance for lap size and larger quilts
and 2 1/4" strips for wall hangings and table runners with a 1/4" seam allowance.  
Scrappy bindings work well on scrappy quilts by joining 15" - 18" pieces, 
even shorter pieces if you don't mind all the seams. 
I luv scrappy binding look.

Lets start by joining your binding strips at a 45 degree angle. 

join binding strip 2

I use the strip piecing method to join my strips..... 
now trim the binding triangles off  leaving 1/4" seam....

strip piece binding 3


...press the seams open.
Press the long edge of your binding in half with wrong sides together, 
keeping raw edges even.
Allowing the quilt to fall off your sewing table makes it
 difficult to keep an accurate seam allowance.
If possible, support your quilt on a table
when you are sewing the binding to your quilt sandwich,
this avoids any drag or
pull that can cause the seam allowance to get narrower.

binding to quilt 1                 


SEWING THE BINDING TO YOUR QUILT

Your best friend for this will be your walking foot.....
leave a binding tail of about 12".... 
start in the middle of the quilt sandwich 
with the binding on top of the right side of the quilt...... 
stitch a 3/8" seam allowance....
keeping the raw edge of your binding and the raw edge of your quilt even.

binding to quilt 2

Stop stitching about 6" from the corner....
with a pin mark the binding 3/8" from the bottom and 3/8" in from the side of the quilt.
accuracy is important here.....

corner 1

now continue stitching.....stopping at the pin...... 
with needle down in the machine, lift presser foot
and pivot quilt to stitch at an angle through the corner.

stitching through corner 2
stitching corner 3

Remove quilt from machine. 

Fold binding to the right over itself at 90 degrees creating a 45 degree fold.


folding corner 2


Fold binding back over itself to the left creating a fold.....
line up the fold with the side you just stitched.
Starting at the fold 
start sewing  the binding to the next side of your quilt.....
remember to stop about 6" from the corner
to mark your 3/8" seam allowance with a pin.

folding corner 3

Continue sewing around the quilt....
stopping about 18" from where you started.


JOINING THE BINDING USING A 45 DEGREE SEAM

Fold both sides of the binding so the 2 folds butt up against each other
in the center of the opening.

1

cut left side at fold

2

3

Using the piece of binding you just cut off....
open it flat and lay it against the fold on the right side...

4

**the over lap will equal the width of your binding strip....**
be careful not to cut the bottom binding.....
use scissors and cut along the right side of the binding  

5

Make a big pleat with your quilt in the center of the opening.  
This makes it easier to sew the bindings together on the 45 degree angle....

6

Place left side of binding on the table right side up...open flat..... 
Take the right side of binding...open flat....right side down over the left side as shown......
in other words right sides together just like you joined your binding strips....
be careful not to twist the binding and
make sure the raw edges are even.

8

Draw the 45 degree stitching line and sew

13


14

****Before you trim the binding triangle off ****
  • unpin the pleat to check that your binding isn't twisted
  • and the binding is the right length to fit perfectly flat on your quilt
  • if it looks good......trim the binding triangle off and finger press seam open
  • Sew the remainder of the binding to your quilt sandwich.

Fold the binding to the back of your quilt and you should have nice mitered corners. 
I pin on both sides of the corner and adjust the sides of the corner till they line up perfectly.

Note:  Using the 3/8" does not work if you have stars or flying geese in your border....the points will be cut off.

quilt back corner

If you have struggled with bindings in the past
I hope I was able to ease your fears.  
If you have any questions please email me.

hugs and happy stitching


Friday, May 11, 2012

Last minute Mother's Day gift ideas....

for all quilting Mamas...
wouldn't you love to receive a quilt shop gift certificate!!
Did you know they are available at
Crazyquiltgirl Fabric Shop.
Oh yes... they are and you should see all the new items just listed
in the shop.
 Anne Sutton's Bunny Hill Designs quilt kits.
who wouldn't like one of these.


Raining Cats and Dogs Redwork 
RAINING CATS & DOGS IN REDWORK 54"x61" Quilt Kit


Merry Merry Snowmen Kit
MERRY MERRY SNOWMEN 62"x66" Quilt Kit


  • Threads....check out the wide selection of silk, variegated and thread sets now available.
  • Notions....have been added.
  • Ready made tea towels
  • Toweling by the yard...it is wonderful!!
  • Patterns and books are always being added, new designers and with Quilt Market next week...OMG I'm sure you will find a lot of new ones offered as soon as they are available.  Here is my wish list of patterns coming to Crazyquiltgirl.
    •  Rabbit's Haven patterns by Arlene Neely
    • Coach House Patterns by Barbara Cherniwchan and
    • Oh My Bloomin' Threads patterns by Ronene Wilkinson.

I gotta go.....

hugs and happy stitching

Pauline

Wednesday, May 9, 2012

3 MAY QAL's in blogland....

Quilt-a-long #1

My friends
Mama Spark and Crazyquiltgirl are featuring a Quilt-a-Long....
called SLICED APPLES...


...the first step was posted on their blogs May 1.
and step 2 will be posted on May 14.
Stop by Mama Sparks blog or Crazyquiltgirl's blog
and join in the quilt-a-long and
you will have a chance to win a $25 gift certificate 
from Crazyquiltgirl Fabric Shop. 

There is a flickr group set up to share your progress.
I've got my fabrics picked and am ready to get the 
cutting instructions....that's step 2.

~~~~~~~~~~~~~~~~~~~~~~~~~~~~~~~~~~~~~~~~~~~~~~~

Quilt-a-long #2

Judy from Patchwork Times is featuring
Sweet Treat Quilt-a-Long


You can read all about it on Judy's blog.
...part 2 is HERE.
The quilt measures 70" x 79"
and is great stash buster!!

~~~~~~~~~~~~~~~~~~~~~~~~~~~~~~~~~~~~~~

Quilt-a-long #3

Starting May 11
Reindeer Games hosted by 
Bejeweledquilts by Barb and 
Caroll from Attic Window Quilt Shop

Barb is featuring an applique version of the quilt
and you can read about it HERE.


and Caroll is featuring a redwork version
and you can read about it HERE...


...both are adorable and I want to do all 4 of the quilt-a-longs...
call me crazy!!

Barb and Caroll have a flickr group so don't forget to join
and share all your pictures!!

Well I'm exhausted just thinking about what I want to do!!

I've posted buttons on my side bar for 
Sliced Apples and Reindeer Games
There is no button for Sweet Treat.

hugs and happy stitching

Pauline

Tuesday, May 8, 2012

A WIP finished...with 2 sided binding...and a McCalls Quilting Contest Submission


A WIP is finished and I am so glad I took the time to finish the quilt
with a 2 sided binding.

It's my'Wonky Log Cabin' quilt.

I used a jelly roll....Moda's Sherbet Pips by Aneela Hoey
for the blocks.


I used Aneela's pink 'Square Dots' for the backing.
I wanted to use red for the binding to go with the inner border
but did not want the red with the pink backing.
A 2 sided binding would give the best results...

My first attempt with a 2 sided binding...
was a Moda Bakeshop quilt called 'eat, play, sleep, repeat'
back in July 2011.

It is a little more work but I luv the results!!
I have found I'm using a 2 sided binding a lot more lately.

Have you ever made a two sided binding???


The quilt shown below was designed by my friend Christa
and was donated to 'Vista Maria' to be auctioned at their fundraiser
just last week.

She also decided
to enter the quilt in the
McCall's Quilting Design Star Contest.


Christa asked me if I would have time to do the binding...
...of course...binding is my favorite part of making a quilt.
We both agreed it would look best with a two sided binding...
black and white polka dots on the front
and the lime green and white flowers on the back.


The quilt is beautiful...even more beautiful 'in person'!!


I have 2 tutorials I'm working on....

message boards with chalk cloth
and
2 sided binding

coming soon!!

Also coming soon will be a giveaway....600+follower giveaway!


hugs and happy stitching

Pauline


Tuesday, May 1, 2012

Table Topper Message Board Winner....

Thank you to everyone who left me heart warming comments ....

and the winner is ....Christine, 

"I love the message boards! How Cool..thanks for the link to the chalkboard fabric! Definitely on my to do list... My SIL will love it!"

I have sent Christine an email.

~~~~~~~~~~~~~~~~~~~~~~
There was a lot of interest in having a tutorial on
 how I made the message boards.
I'm  hoping to have the tutorial posted by next week.
I will also be hosting a giveaway to celebrate 600+ followers...(o:
~~~~~~~~~~~~~~~~~~~~~~

I am getting more comfortable quilting on my Gammill and 
this weekend I quilted two small quilts. 
I've finally given my long arm a name......Ms Lizzy when she cooperates
and Ms Elizabeth when she gives me grief.
We are becoming good friends...(o:

...so Ms Lizzy and I quilted


a donation quilt on Saturday using
Moda's Hullabaloo by Urban Chiks


and on Sunday I quilted
a small lap quilt, pieced by my DDIL.
She used Moda's Martinique by 3 Sisters.

I have another quilt loaded on the frame ready to 
quilt....it is 1 of 3 donation quilts I have ready to quilt for the 
Veteran Hospital in Ann Arbor.

I'm hoping everyone finds a little time to stitch this week.

Until next time....
hugs and happy stitching